
In this article
Who doesn’t want to feel stronger and more limber? Or feel less pain and stress?
Those are among the promises of yoga, and chances are if you haven’t already tried this ancient art once or twice, you’re intrigued by its benefits.
Practiced for thousands of years across India, yoga has resurfaced across the globe as a modern-day antidote to fast-paced living.
Known for reducing tension in the mind and body, yoga also has a host of additional benefits including lowering blood sugar levels, improving low back pain, and – what we’re focusing on today – increasing flexibility (1).
And here’s the awesome thing: you don’t have to be able to bend like a pretzel in order to get those benefits. There are plenty of yoga beginner poses that will give you payoffs, fast.
Why Get Flexible with Yoga?
For one, practicing yoga gradually loosens the connective tissue and muscles surrounding our joints, allowing for better blood flow, less compression, and a reduction of aches and pains (2).
It also helps to move the joints through their full range of motion, increasing the amount of oxygen and nutrient flow to protective cartilage.
Both of these factors are critical in preventing and easing arthritis pain, carpal tunnel syndrome, and chronic joint pain (3).
And thanks to all of those benefits, adding yoga to your workout routine can help speed your workout recovery.
Many strength-training exercises are repetitive and focus on shortening muscles (think squats, shoulder presses, etc.), which can eventually lead to less range of motion.
A smaller range of motion, even if you’re extremely fit, may at some point lead to injuries, especially when you transition into unfamiliar movements.
That’s because instead of muscles that are strong yet bendable, you end up with muscles that refuse to lengthen, which can lead to tissue tears and joint stiffness.
Stretching for Strength
Not only will increased flexibility prevent injuries, but studies have shown that stretching actually increases muscle strength.
Researchers found in a study published in the Journal of Strength and Conditioning Research that a stretched calf muscle increased by 29 percent in strength during training, while an unstretched calf muscle only increased 11 percent in strength over the course of 10 weeks (4).
Yoga also can help you sculpt a stronger core. Isometric exercises like yoga, which involve holding one position without moving, have been found to be one of the best ways to increase core strength (5).
Improving your core strength will allow you to go deeper into your yoga poses, as some require a great deal of balance. This will in turn increase your flexibility even more, allowing you to move to more advanced poses.
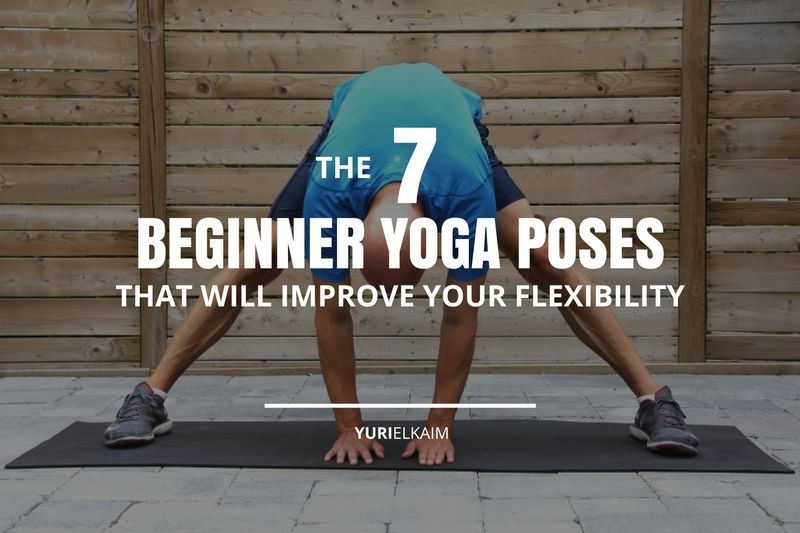
Best Yoga Poses for Beginners
With that being said, let’s get started! Below are seven yoga beginner poses that can be practiced every day to improve flexibility:
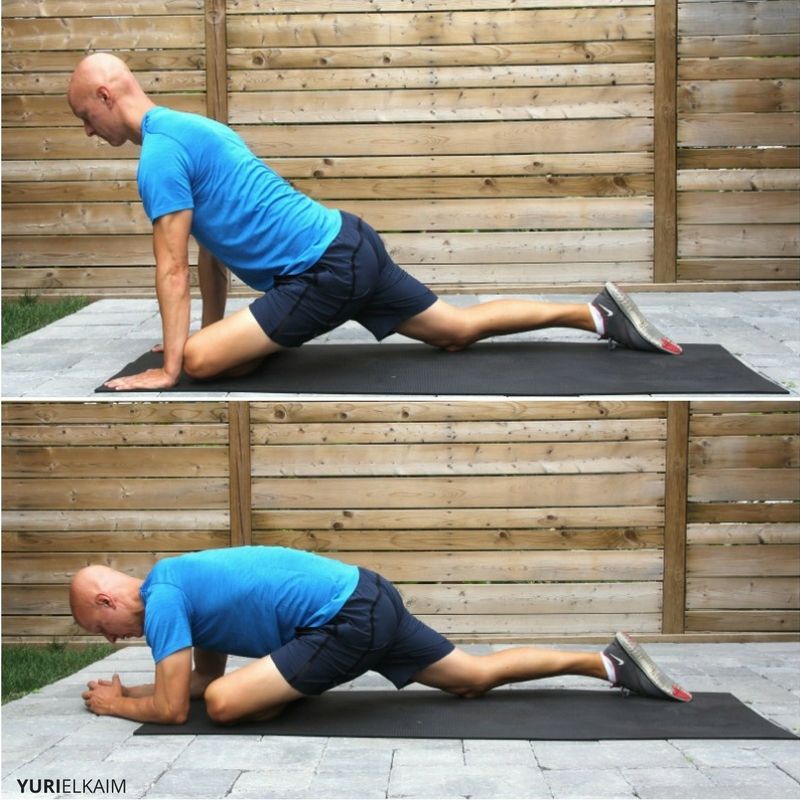
1. Downward Dog (Adho Mukha Svanasana)
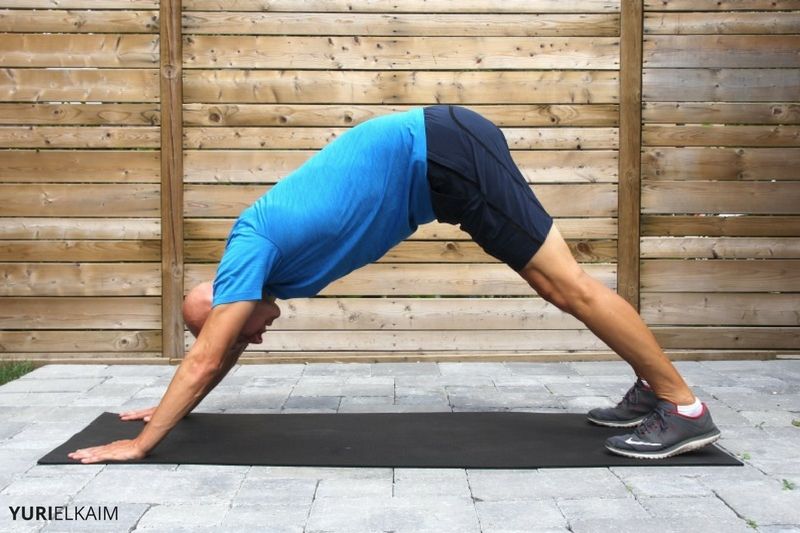
Downward dog is one of the most widely recognized yoga poses. It stretches the hamstrings, shoulders, calves, and arches of the feet, while also strengthening the upper and lower body.
Tips: If you’re having trouble opening your shoulders during the pose, use a block or two to elevate your hands until your shoulder flexibility improves. Also, be sure to always pull in your navel toward your spine in this pose.
How to do it:
- Begin on the floor with your knees directly under your hips and your hands slightly forward from your shoulders.
- Turn your toes under, spread your fingertips, exhale, and raise your knees off the floor.
- Lengthen your tailbone to the sky, and hold your head between your arms.
- Feel your hamstrings stretching as you gently work to touch your heels to the ground (this may not happen at first, but will occur over time).
- Hold this pose for one to three minutes.
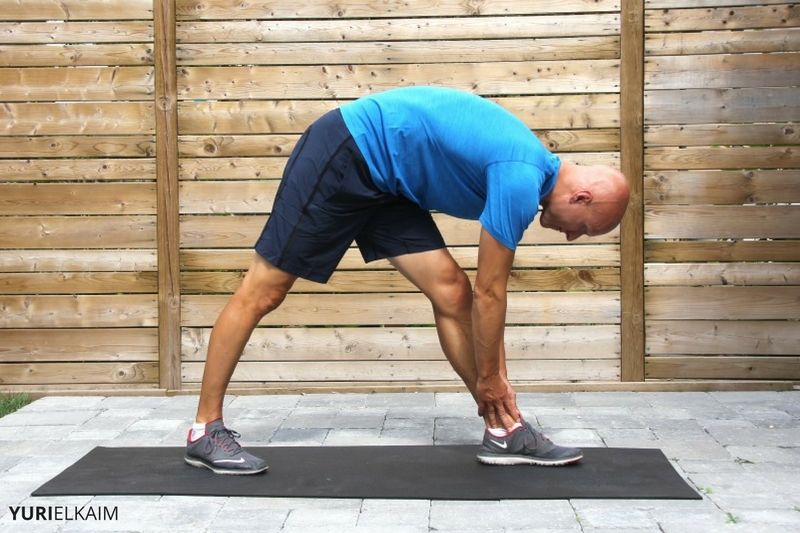
2. Seated Forward Bend (Paschimottanasana)

Seated forward bend is amazing at improving hamstring flexibility (thus also improving your downward dog), along with spinal and shoulder flexibility.
Tip: Don’t force the forward bend. You may only be able to lean forward a few inches, which is okay! Never push beyond what is comfortable for your muscles; only to the point of feeling a deep stretch.
How to do it:
- Begin seated on the floor with your legs extended straight in front of you.
- Sit tall and lengthen your tailbone, then exhale and proceed to lean forward, walking your hands down your legs, until you feel a deep stretch in your hamstrings and spine.
- Stay in this pose for one to three minutes, lengthening on each exhale.
You can also use a band for this pose, wrapping it around the arches of your feet to aid in pulling you gently into a deeper stretch.
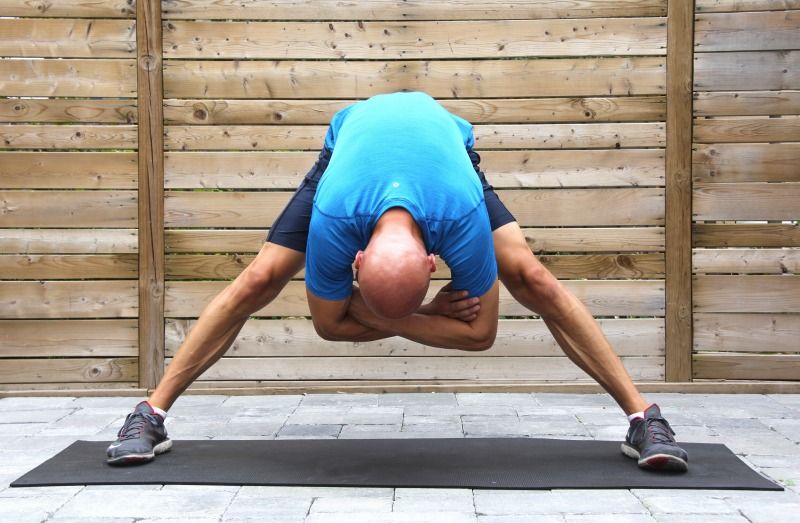
3. Wide-Legged Forward Bend (Prasarita Padottanasana)
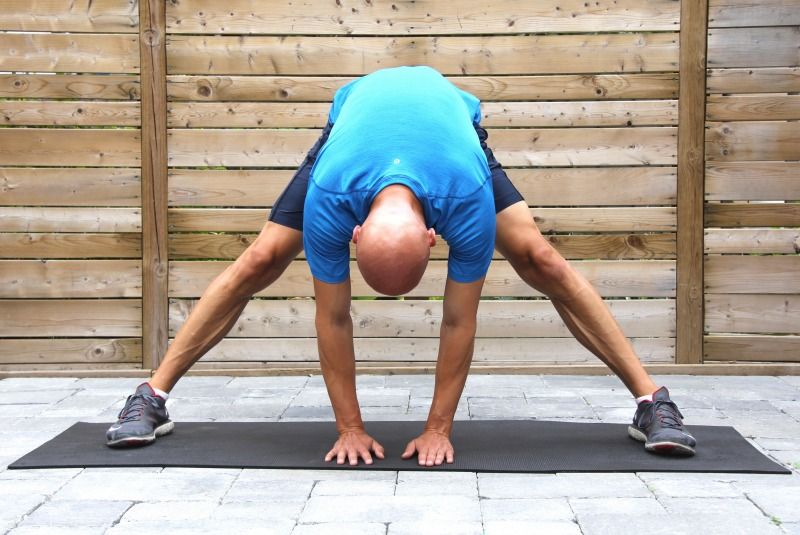
The wide-legged forward bend provides a deep stretch for the inner and outer thighs, as well as the lower back and spine.
Tip: It may be difficult for beginners to bend fully without rounding the spine. In order to protect the lower back, try resting your hands on blocks or, if you’re not quite there, a chair or stool… or just cross your arms.
How to do it:
- Begin by standing tall at the front of your mat.
- Turn and spread your feet wider than shoulder length, hands on your hips.
- Inhale and lengthen your torso, then exhale and lean forward from your hips.
- As you come to parallel with the floor, let your fingertips touch the floor below your shoulders.
- You can remain here if the stretch is sufficient, or continue to bend forward until the crown of your head is touching the floor (this will likely take a good deal of practice!)
- Hold this pose for one to three minutes.
4. Extended Triangle Pose (Utthita Trikonasana)
Extended triangle pose is a full-body flexibility pose, stretching the hips, groin, hamstrings, calves, shoulders, chest, and spine in one movement.
Tip: Beginner’s may need to brace their torso against a wall at first, as this pose requires a good deal of balance.
How to do it:
- Begin with your feet wider than hip-width apart on your mat, arms extended out from your sides.
- Rotate your left foot in slightly, while rotating your right foot out at a 90-degree angle. Keep the right and left heels aligned.
- Exhale and extend with your torso out over your right leg, bending from your hip.
- Rotate your torso to the left and walk your right hand to your shin or ankle.
- Go far enough to get a good stretch, but not so far as to distort your torso.
- Press your back heel into the floor.
- Stay in this pose for 30 to 60 seconds on each side.
5. Eye of the Needle (Sucirandhrasana)
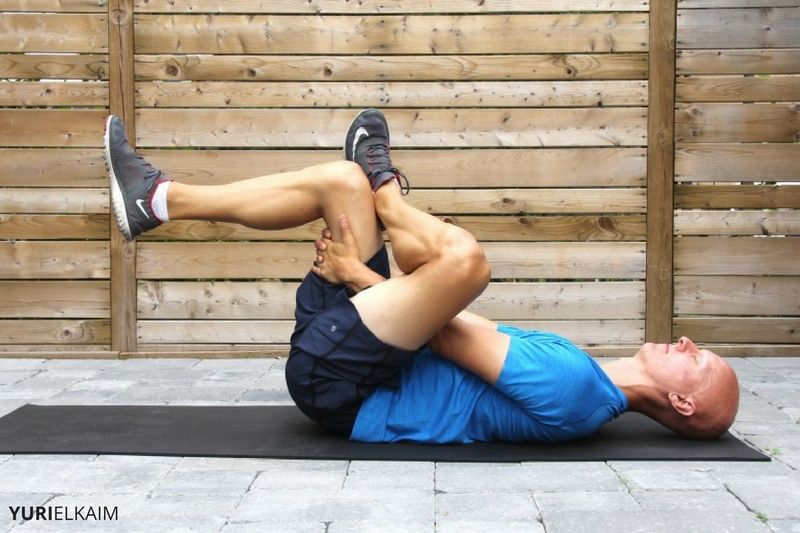
Eye of the needle pose is one of the best poses to stretch the hip muscles.
How to do it:
- To begin, lie on the floor on your back.
- Cross one ankle over the opposite thigh and feel your hip release.
- You may want to stay with just the ankle crossed, but if you’re looking for a deeper stretch, go ahead and lift the bottom leg off the ground slightly, wrapping your arms around the hamstring for support.
- Hold this pose for 30 to 60 seconds, then switch legs.
6. Cobbler’s Pose – (Baddha Konasana)
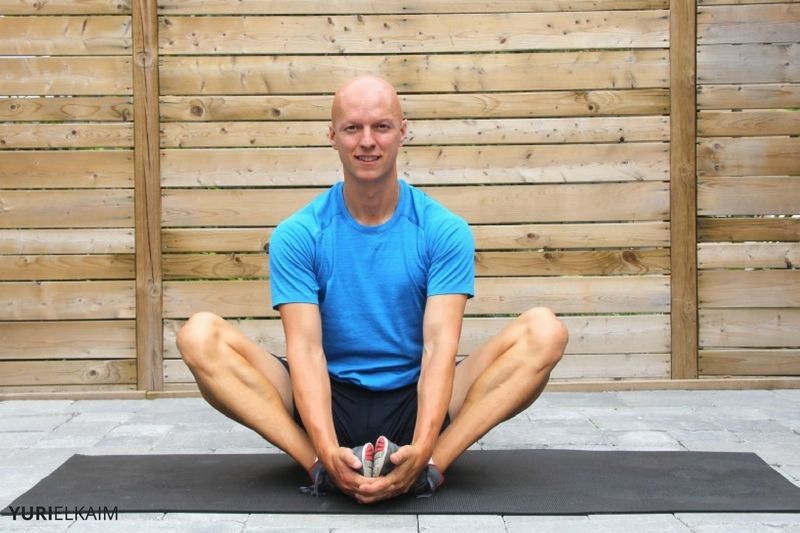
Cobbler’s pose is a fantastic hip opener and inner-thigh stretcher, making it a great complement to the wide-legged forward bend.
Tip: If this pose is uncomfortable at first, feel free to place blocks under your knees for support.
How to do it:
- Begin seated on the floor. Bend your knees and bring the soles of your feet together.
- Let your knees fall to either side, drawing in your heels toward you as close as you feel comfortable.
- Sit tall and make sure your feet stay pressed together.
- Hold cobbler’s pose for one to three minutes.
7. Pigeon – (Eka Pada Rajakapotasana)
Pigeon pose stretches the inner thighs, hips, and back.
Tip: Beginners will probably have to use a block beneath their booty at first, since most people’s hips are pretty tight.
How to do it:
- Begin in a low lunge position.
- Lower your back knee to the floor, then fold your front knee onto the floor in front of you.
- Keep your back leg straight and lower your booty toward the floor. You should feel a deep stretch in your hip flexors and possibly front quadricep.
- Keep your hips squared to the front of your mat at all times, exhaling into your hips.
- Hold for roughly 30 to 60 seconds, then switch legs.
Happy Body, Happy Mind
For the best results, try practicing these basic yoga poses for beginners daily.
You’ll notice an increase in your flexibility and range of motion, while, as a bonus, a little extra peace of mind.
Are Your Workouts Beating You Up?
Feeling stiff and sore, or maybe even a little stale when it comes to recovering from exercise? You might just need some little tweaks to your routine.
Get my 11 overlooked post-workout strategies to speed recovery, reduce stiffness, and help you feel unstoppable – for FREE.
Download my Workout Recovery Formula guide right now by clicking the banner below, and be on your way to limber, more “supple” body!
