In this article
Some pains are not what (or better yet, where) they seem.
For instance, low back pain must be due to a problem in the low back, right?
And what about knee pain – surely there’s something wrong with the knee that can only be cured by knee surgery, right?
While sometimes those observations are correct, most of the time that pain actually originates elsewhere.
Where? It all starts in the hips.
Tight Hips: The Root of Many Ails
You might not think about your hips much as you go through your daily schedule of sitting down for breakfast, sitting in your car to drive to work, sitting at your desk during the day, then sitting down on the couch to unwind in the evening.
But trust me, with all that sitting your hips are thinking about you.
Specifically, they’re thinking about what type of pain they can create in your body to stop you from sitting so much.
That’s because too much sitting does a number on the many muscles and ligaments surrounding your hip joint, often inviting the glutes, quadriceps, hip flexors, hamstrings, and groin muscles to join the pain party.
The reason this occurs is because when you sit excessively, the hip flexors at the front of the hips begin to shorten and tighten, while the glutes and hamstrings weaken through lack of use.
This throws your entire posture out of whack and increases pressure on your spine and knees from improper alignment. That’s when you’ll begin to notice low back pain, knee pain, and even sciatica as the piriformis muscle running through the hips becomes tight and inflamed (1).
Even if you’re not experiencing pain, you may still notice the impact during your workouts.
For instance, you might notice that your squats and other exercises are affected by tight hips, since they can cause you to round your spine and limit you from going through full range of motion. This can, of course, then lead to injury (and you thought a little low back pain was bad!).
Why Does Hip Mobility Matter?
Your hips are designed to move in multiple directions, with muscles that help you do everything from climbing stairs to swimming.
When you have good hip mobility, you can do all of those actions with ease and without restrictions in movement.
By doing specific hip mobility exercises you can help your hips become more agile, counteracting the effects of sitting while helping you increase your range of motion.
These exercises help you loosen the tight muscles surrounding your hips, which allows your spine to come into proper alignment. As you might imagine, being in alignment can lower your risk for workout-related injuries, since you’re in the correct position for lifting heavy weight without putting pressure on your spine.
Not to mention, everyday activities like squatting to pick things up, or balancing on uneven surfaces, become easier when your hips are mobile.
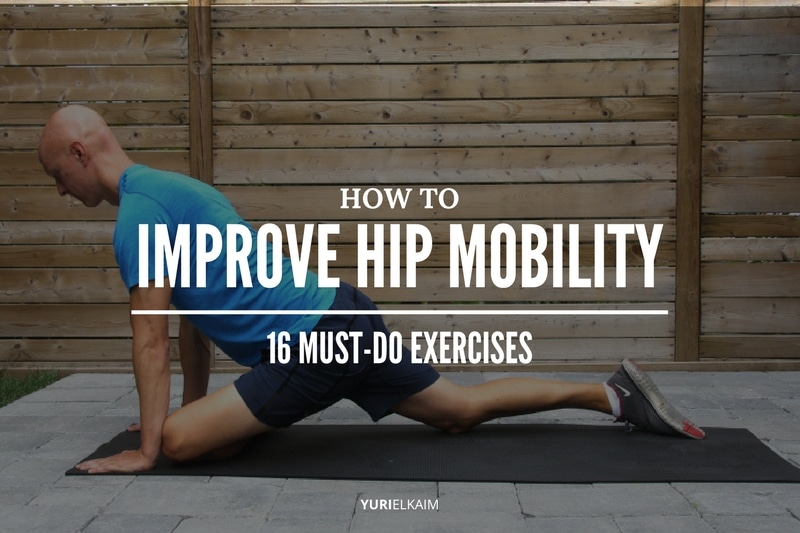
How to Improve Hip Mobility
The following sets of drills are broken down into sections requiring equipment, yoga-based mobility poses, and stretches that are equipment-free.
No-Equipment-Needed Hip Mobility Stretches
These hip mobility routines are equipment-free, allowing you to do them anywhere without having to visit a gym.
You’ll notice that many are also dynamic and flow from one stretch to another, which is great for targeting multiple large muscle groups surrounding the hips at once. They are also excellent for incorporating into warm ups.
1. Low Lunge
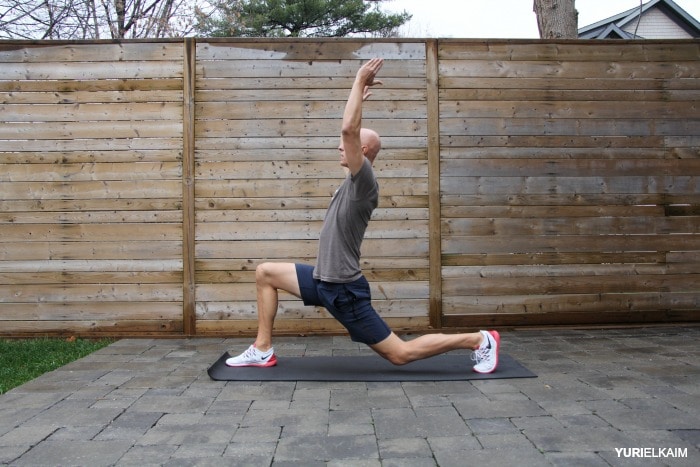
How to perform it:
- Begin by lowering into a lunge position. Lower your back knee to the floor, making sure to keep your hips squared forward and your chest open.
- Don’t be afraid to adjust your back leg placement until you feel a deep stretch through your hip. You might need a wider or shorter stance depending upon how tight your flexors are.
- Hold for 20 to 30 seconds, then switch legs.
2. Butterfly Stretch
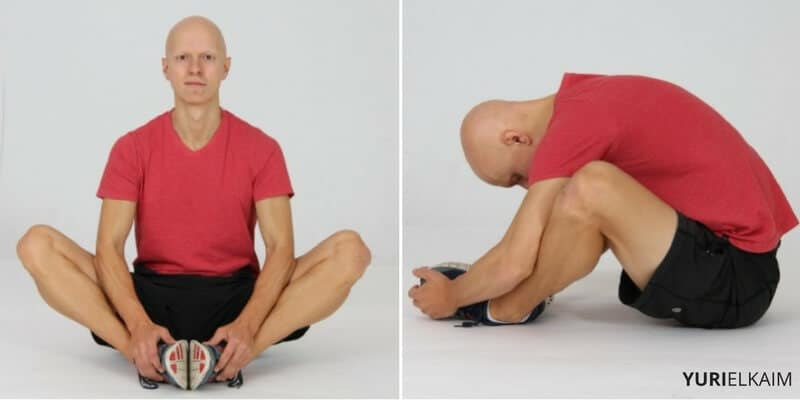
How to perform it:
- Begin seated, spine straight and legs extended in front of you.
- Draw your knees in toward your chest, then let your knees fall to either side of your torso. Touch the soles of your feet together.
- To deepen this stretch, pull your feet in closer toward your glutes.
- Hold for 15 to 30 seconds.
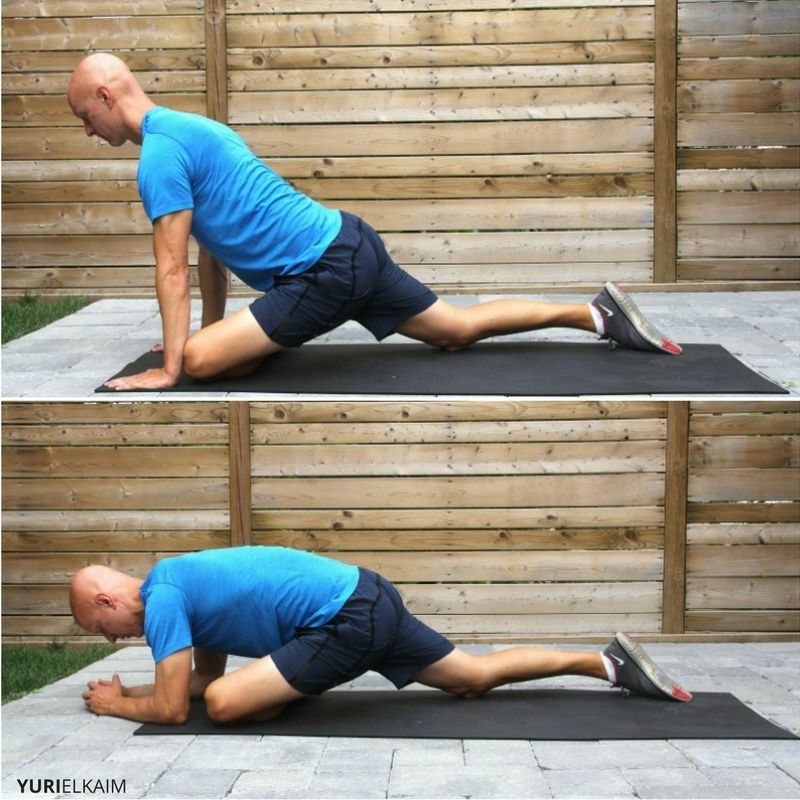
3. Walking Spiderman Lunge with Reach
How to perform it:
- Begin standing, then step out on your right foot at roughly a 45-degree angle into a lunge.
- Touch the floor with both hands on the inside of your right foot, keeping your chest lifted. Lift one hand off the floor and reach skyward, rotating your chest upward.
- Push back to a standing position, the lunge forward and repeat on the opposite leg.
- Perform for 5 to 10 reps.
4. Adductor Rockbacks
How to perform it:
- Begin in a kneeling position. Place your hands on the floor in front of you, then start to widen your hips by extending on knee out to the side at a time.
- Touch your toes together behind you and begin to rock forward and backward slowly, feeling the stretch through your groin.
- Keep this “rocking” motion up for 30 seconds.
5. Deep Squat to Stand
Note: Watch this exercise at the 0:30 – 0:44 second mark.
How to perform it:
- Begin by standing stall, feet slightly wider than hip-width apart. Hinge forward into a forward bend, grasping your toes if you can.
- Now, instead of returning to standing, lower your glutes toward the floor and come into a deep squat.
- Release your toes and stretch your arms forward.
- Hold for a breath, then grasp your toes again, lift your glutes to return to your forward fold, then return to standing.
- Repeat for 5 to 8 reps.
6. Elevated Pigeon on a Box
How to perform it:
- Begin by grabbing a large box or finding a large elevated surface to rest your shin on.
- Lift your right shin onto the box and rest it at a 90-degree angle to the top of the box. You left leg should be extended straight behind you.
- Press into your hips toward the box, flexing your right foot. To deepen the stretch, lean forward over your right leg.
- Hold for 15 to 30 seconds, then repeat on the other leg.
7. Pigeon Pose
How to perform it:
- From a seated position, bring your right shin out and in front of you, bending your knee so that it is parallel to the front of your mat.
- Stretch your right leg back behind you, focusing on keeping your hips squared forward. Flex your right foot.
- If you’re having trouble touching your right hip to the floor, place towels or a block beneath it to make the stretch easier.
- If you wish to go further into the pose, lean your torso over your front leg.
- Hold for 15 to 30 seconds, then switch sides.
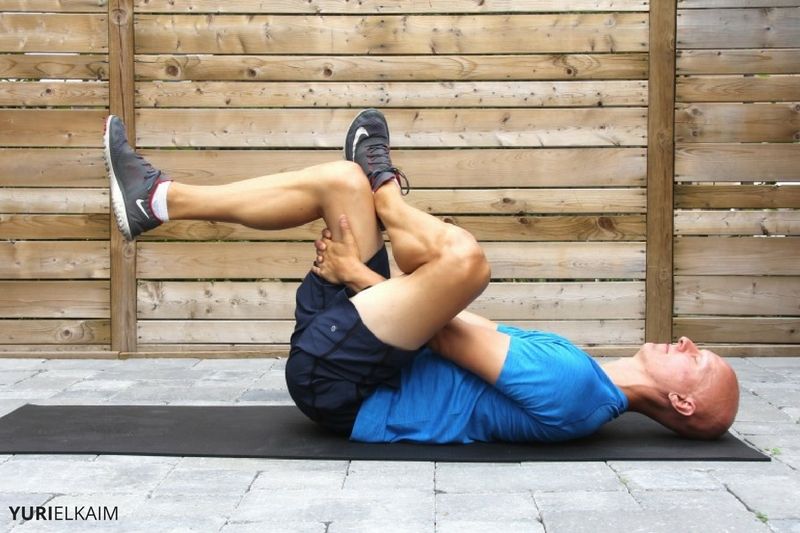
8. Happy Baby Pose
How to perform it:
- Begin lying on your back on your mat. Now, bend your knees in to your belly and grasp the outside of your feet with your hands (if you have trouble doing this, loop a band or belt around your soles to hold).
- Open your knees wider than your torso and draw them in toward your armpits.
- Flex through your heels and gently press against your hands or bands with your feet.
- Hold for 15 to 30 seconds.
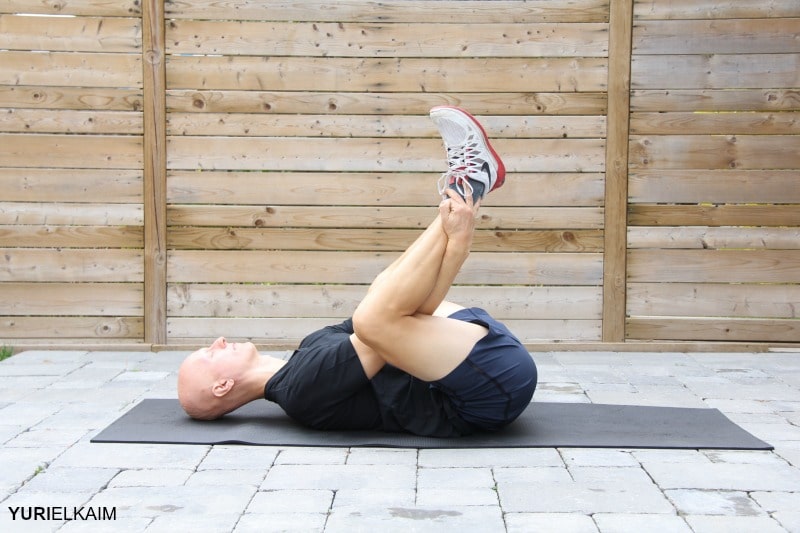
9. Eye of the Needle Pose
How to perform it:
- Begin by lying on the floor on your back. Lift your legs and cross one ankle over the opposite thigh. You’ll probably already be able to feel the stretch through your hip.
- You can stay here with just your ankle crossed, but if you’re looking for a deeper stretch, go ahead and lift the bottom leg off the ground slightly, wrapping your arms around your hamstring for support.
- Hold for 15 to 30 seconds, then switch legs.
10. Lizard Pose
(Image: Gaia)
How to perform it:
- Begin in a lunge position with your right leg forward. Lower your forearms to the floor on the inside of your right leg.
- Focus on reaching back with your left heel and keeping the hips and chest lifted.
- If this is too difficult, lower your back knee to the floor.
- Hold for 15 to 30 seconds, then switch sides.
11. Frog Pose
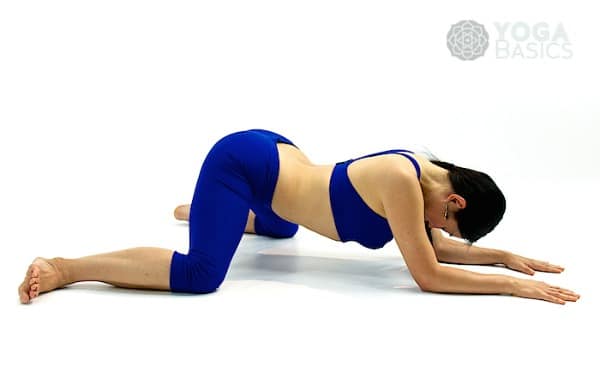
(Image: Yoga Basics)
How to perform it:
- Begin on your mat on all fours. Bring your forearms to the floor.
- Widen your knees one at a time as far apart as possible until you feel a deep stretch. Your thighs and shins should be at a 90-degree angle.
- Flex your feet and keep you tailbone down and your spine straight.
- Hold for 15 to 30 seconds.
12. Half-Kneeling Box Stretch
How to perform it:
- Begin by grabbing a small box for this exercise. Come into a half-kneeling position in front of the box – or couch (one leg forward and the other behind you with one knee on the ground).
- Lift your rear foot to rest your toes on the box. You can rest your hands on your knee for balance.
- Vary your stance until you feel a deep enough stretch for your level of flexibility.
- Hold for 15 to 30 seconds then repeat on the other leg.
Hip Mobility at the Gym (Equipment Needed)
These hip mobility exercises require basic gym equipment, such as kettlebells and resistance bands, so try these out the next time you visit the gym.
13. Banded Lunge
How to perform it:
- Begin by grabbing an exercise band and finding a stable piece of equipment to loop one end around.
- Place your left rear leg through the band loop and pull it up as high as you can.
- Step forward with your right leg and lower into a lunge (rock forward and back slightly to deepen the stretch).
- Do this for 15 to 30 seconds, then switch banded legs.
14 & 15. Band Step Overs and Standing Band Thrusts
- Begin by looping your band around two stable beams, making sure it’s taut.
- Stand parallel to the band and, with your core firmly engaged and maintaining your posture, lift your leg closest to the band up and over the band, followed by your other leg.
- Once you step completely over, repeat by stepping back over again. Really focus on your hips and glutes as you step back and forth, varying your pace.
- You can adjust the height of the band if you’re struggling to lift your leg high enough to step over.
- You can also use a hurdle if you prefer.
- Repeat going back and forth 10 to 12 times.
How to perform Standing Band Thrusts:
- Begin by looping your band between two sturdy beams until it’s stretched taut.
- Stand in front of the band and so that your hips are pressing against it, stepping forward slightly to get a bit of resistance.
- Push your hips back, then forward by engaging the glutes, focusing on contracting the muscles, similar to a standing hip thrust.
- Repeat for 10 to 15 reps.
16. Kettlebell Deep Squat
How to perform it:
- Begin standing with your feet slightly wider than shoulder-width apart and slightly turned out, a kettlebell resting on the floor in front of you.
- Keeping your spine straight and engaging your glutes, lower into a deep squat, keeping your weight in your heels. Feel the stretch through your groin.
- Grasp your kettlebell in both hands and lift it in front of you, arms extended. Hold it here or begin to lift it up and down.
- Repeat for 15 to 30 seconds.
Do These Exercises Daily
Ideally, you should perform hip mobility stretches every day, especially if you spend a lot of time sitting.
If possible, spend at least 10 minutes with several of these stretches, holding each for roughly 30 seconds each.
These also make a great post-workout active-recovery cool down, because when your body is warm you can get deeper into the stretches.
Find the Best Exercises For Your Hips
Don’t be afraid to experiment – try mixing and matching exercises different categories. For instance, you can combine some yoga hip mobility poses with banded exercises, and so-on.
Different combinations will keep those hip muscles guessing for a well-rounded hip mobility routine.
Go From Sore to Supple
Do your muscles feel stiff and sore?
You’ll want to steal my 11 best workout recovery strategies, which will help improve your flexibility, reduce stiffness, and help you feel good again.
My Workout Recovery Formula will put you back on the road to feeling loose and limber – fast! And it’s FREE!
Just click the image below to get it now.