In this article
If you’ve been reading my articles or following my training, you know that I put a lot of emphasis on “functional exercises” – movements that have a direct connection to your daily life.
Why?
Because these exercise are, without a doubt, the most useful way to spend your time in the gym.
Not only do functional exercises give you all the standard bgenefits of physical activity, but they also increase your overall mobility, making it easier for you to keep up with the demands of life.
What good is an exercise if you never do anything even remotely similar to it in the real world?
When it comes to basic, functional movements, the squat is king.
Regardless of your goals – whether you’re trying to lose weight, build muscle or just feel better – squats should be the foundation of your entire routine.
Okay, I’m getting a little excited. Let’s look into some of the hard science at work here so you can see why squats are so important.
Of course, we’ll also talk about how squats should be done and some alternative exercises, as well.
All the Benefits of Squats
Occasionally, you’ll hear experts on the subject refer to squats (and similar movements like deadlifts) by the intriguing term, “primal movements.”
By this, they mean that the squat is built into the way that our body is built to move; It’s something humans have been doing for a very, very long time.
And, when you observe people, this isn’t really all that surprising. Even babies routinely squat (with flawless form) when they’re just going about their day, being babies.
In fact, cultures around the world squat regularly, instead of sitting or even standing for extended periods.
Why does that matter? Because it illustrates just how powerful the connection is between the human frame and the posture in question is.
But, why does our body want to squat? And, more to the point, what are the benefits of doing squats – which, in my mind, are like the ultimate functional training exercise.
More Efficient Movement
The first benefit of squats, which we’ve already briefly alluded to, is that it improves our ability to move. As a compound exercise, squats involve several joints, requiring various parts of your body to work together as a single unit.
Your ankles, knees, hips and spine all have to coordinate their efforts to drop you down and (safely) pick you back up again.
Squats as an exercise, then, improve the mobility of these joints – helping to reduce any of the standard aches and pains associated with life. That may seem like a pretty bold claim but, when you consider the way that the joints interact with your body as a whole, it make sense.
In sports medicine, kinesiology, and other related fields, you sometimes encounter the concept of the kinetic chain (1). Originally based on principles used in mechanical engineering, the kinetic chain refers to the idea that all connected, consecutive joints should be viewed as one, big unit.
What, exactly, does that mean?
Think about what happens when you squat: Your ankles bend, then your knees flex, at the same time your hips need to drop, all the while your back and abs need to work together to keep you upright and balanced. No one joint is operating alone.
And what happens if one of those joints doesn’t do its job? The whole movement is thrown off.
This same principle can be translated to just about everything you do. If your hips are tight, for example, they’re going to pull on your lower back and create pain that could even radiate up to your neck and shoulders.
Squats help to develop and condition this entire kinetic chain so that, when they’re done properly, your body is better trained to work more efficiently as a complete unit.
The Parties Involved
Along with working all those joints, squats challenge a number of different muscles groups.
As we’ll see shortly, exactly which muscles get worked depends largely on which squat variation that you’re working with – since you can easily shift where the brunt of the resistance is being placed.
For now, let’s focus our attention on the basic, yet effective, bodyweight squat.
The target muscles – or the muscles doing most of the work during the bodyweight squat – are your quadriceps and your gluteus maximus.
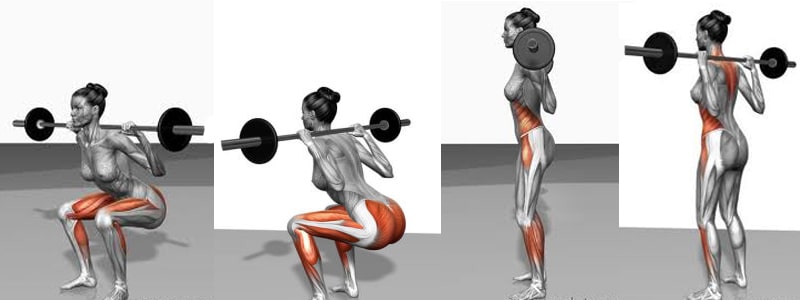
Illustration of the muscles worked in the Squat exercise.
However, the muscles in your calves and butt both function as synergists – meaning that they assist the quads in performing the movement. At the same time, your hamstrings and core all contract to provide stabilization, which is how squats also work the abs.
Squats Burn Fat
Typically, people think about squats and other similar exercises as strictly tools for bulking, but tend to avoid them when it’s time to slim down.
In reality, the squat is – or could be – a powerful weapon when it comes to weight loss. That’s because the number of calories burned during any given exercise is directly related to the number of muscle fibers activated by that particular movement.
This makes sense if you think about it in terms of engine size and fuel economy; the bigger the engine, the more fuel it’s going to need. Your legs have among the biggest muscles in your body. We saw earlier, though, that they aren’t the only muscles at work during squats, however.
So, in one movement, squats involve lots of muscles that will burn calories for fuel.
Heavy lifting also comes with another interesting weight-loss-related benefit: Excess Post-exercise Oxygen Consumption or EPOC (2).
When you exercise, regardless of the form it takes, your body requires oxygen. That’s why you automatically start breathing faster.
This need for more oxygen increases when you work more muscle fibers since that oxygen is vital for proper recovery.
The interesting thing, however, is that each liter of oxygen you take in requires you to burn about five calories in order to use it.
As a result, any activity that increases your need for oxygen also increases the amount of calories you burn. And the metabolic boost from EPOC can last an impressively long time after your workout ends – up to 48 hours.
But that’s only touching on the short-term calorie torching effects of squats.
In general, even when you’re relatively inactive, your metabolism will be faster if you have more muscle mass. By spending time developing the muscle groups that are naturally large and hard-working, you set yourself up to burn more calories even when you aren’t moving around.
[Related: The #1 Cause of a Slow Metabolism]
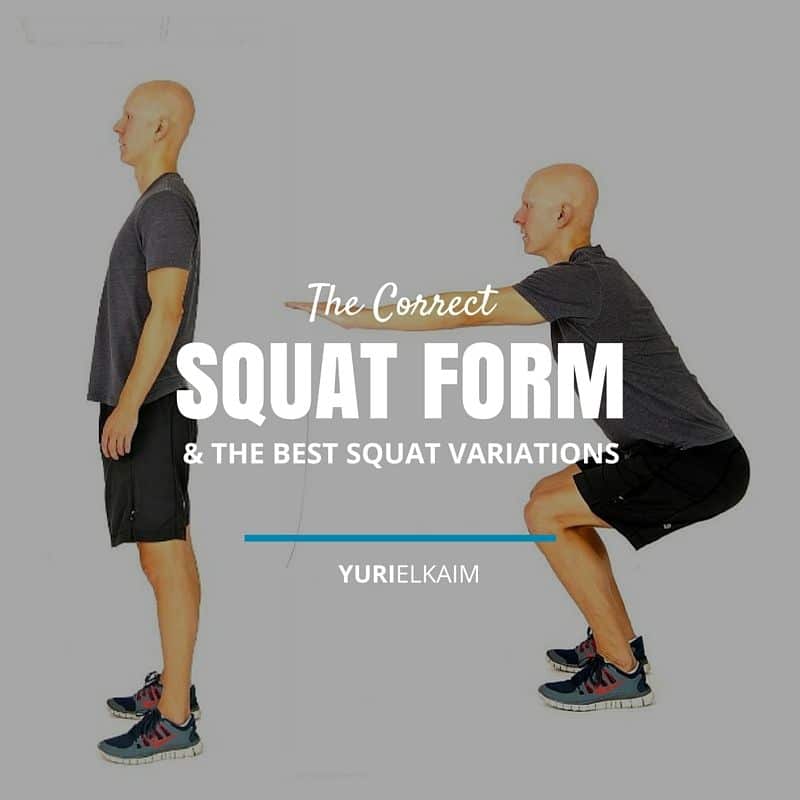
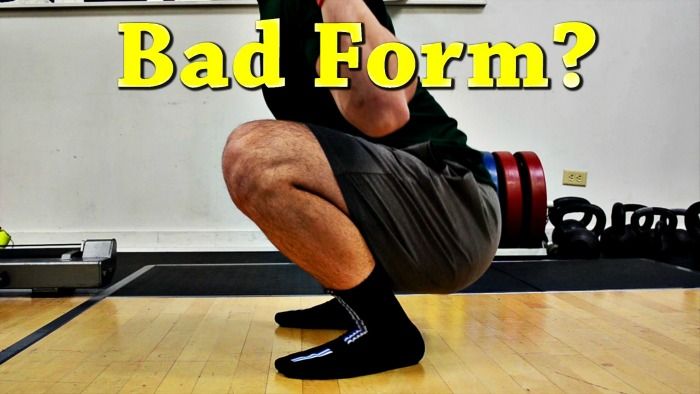
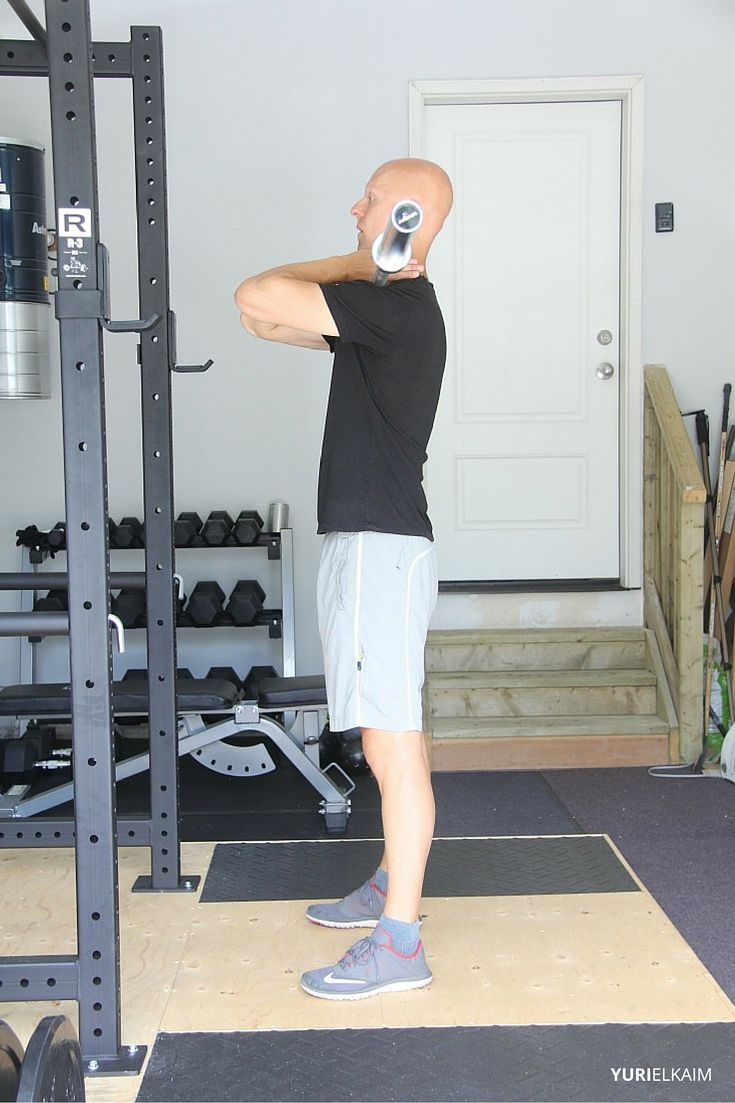
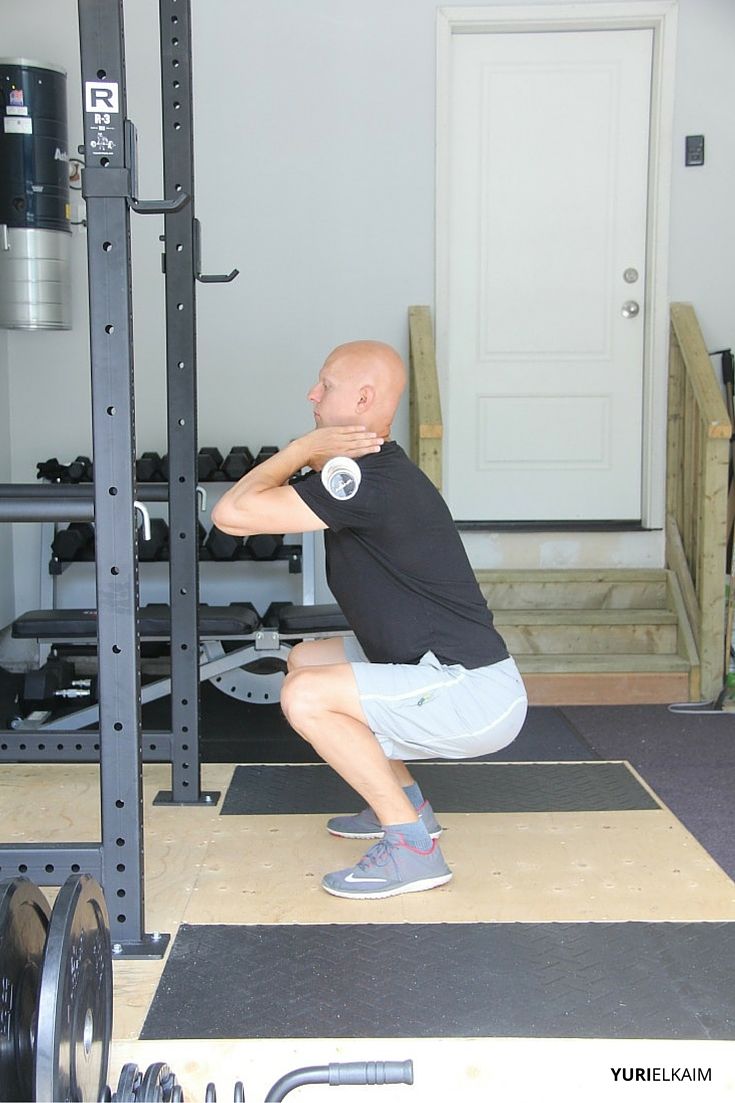
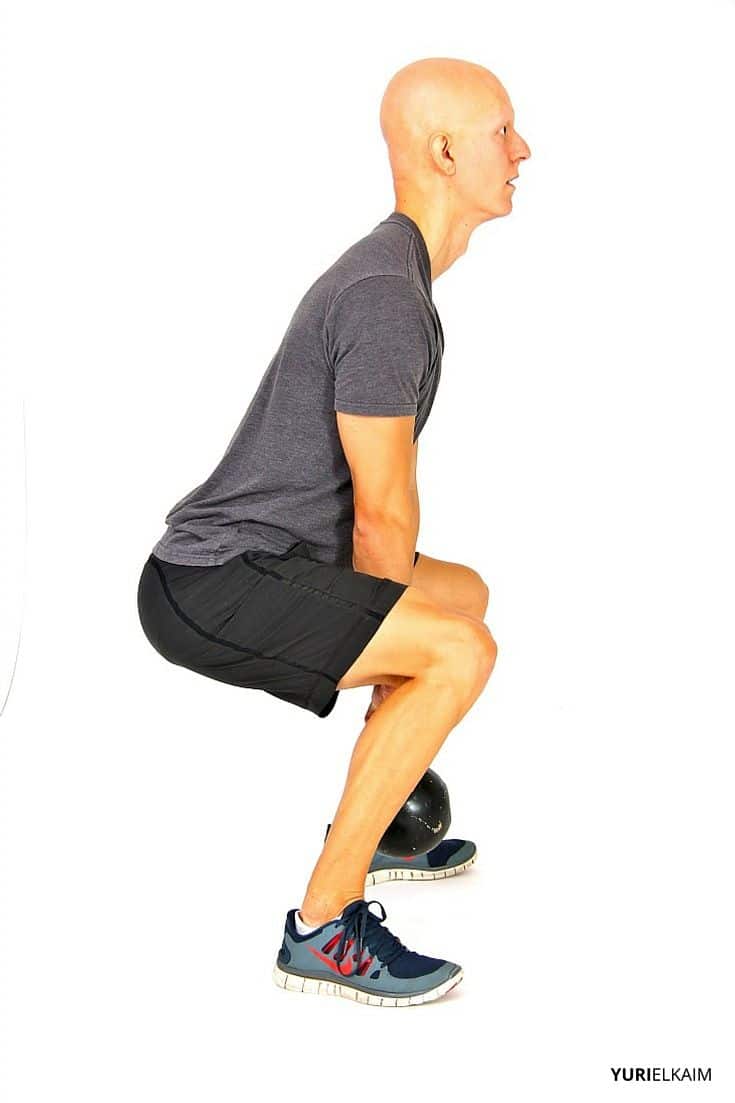
Correct Squat Form Check
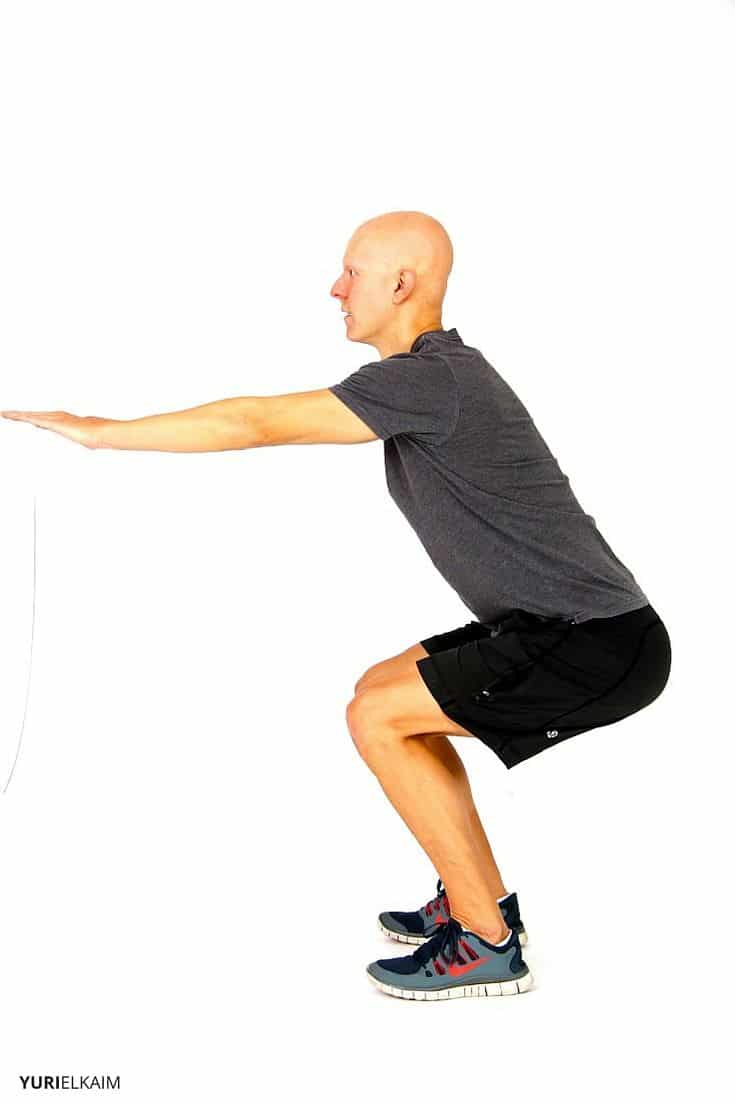
Bodyweight Squat
I hope I’ve made it clear just how useful the squat can be. But, like any other activity, squats need to be done with proper form to be sure that you’re getting the most out of your investment.
To help set the foundation for what’s to come, let’s deal with the bodyweight squat for now. Like many other bodyweight exercises, this variation on the squat is an ideal way to help you develop proper form with a minimal amount of risk if you make a mistake.
As an added benefit, the transition from bodyweight squats to weighted back squats is a very easy one to make since form for the two movements is almost identical.
How to do it:
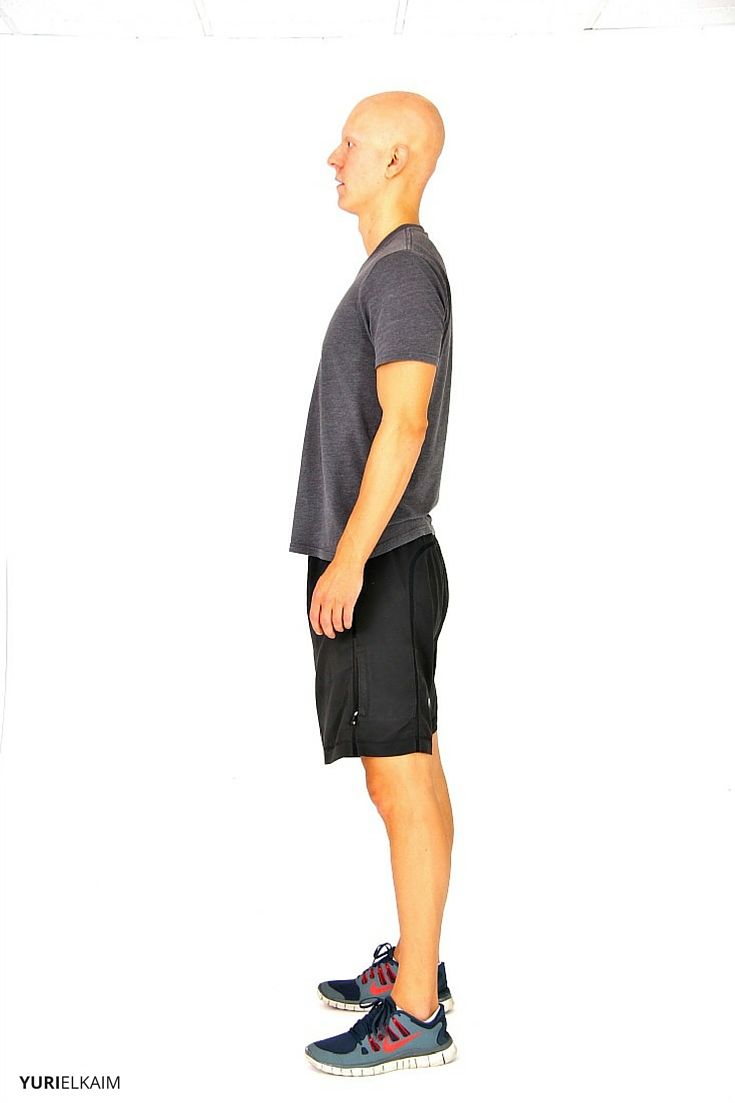
- Stand with your legs slightly wider than shoulder-width apart and your toes pointed slightly outward.
- Extend your arms straight out in front of you for balance.
How to do it:
- Keeping your core tight and your back straight, drop your hips back toward the ground.
- At the same time, allow your knees to bend forward. Throughout the movement, keep your knees pointed in the same direction as your toes.
- Descend, as if sitting back into a chair, until your thighs are at least parallel with the ground. If you can go deeper without rounding your back, go for it.
- Press into your heels and slowly straighten your legs to return to standing. Do not allow your heels to come up off the ground.
This is the basic squat form, which will hold true for just about any other version of the squat you may ever want to tackle.
It is possible, though, that the bodyweight squat is a bit of a challenge for you – generally due to a lack of flexibility. So, how do you work your way up to a perfect bodyweight squat?
Watch and Learn
For some really clearly demonstrated and practical tips, check out the video “Are You Squat Flexible?” by my buddy Eric Wong. Here are just a few of the highlights:
How to do it:
- Hold on to a post, pole or piece of furniture for support.
- Lower yourself as low as you can possibly go while keeping your back straight.
- In the bottom position, rock back and force in all directions to loosen your joints.
- Still using the pole for support, perform reps of the squats.
Now, you may have noticed the encouragement to go as deep as you can. There’s a strong possibility that this raised some concerns for you when it comes to protecting your knees.
Are squats bad for the knees, as you may have heard? Taking that even further, aren’t deep squats terrible for your joints?
The answer, to both questions, is a resounding “No.”
At least, not if your form is good. And that is precisely why it’s so important to master the bodyweight squat before piling on the weights.
Squats and Knees, Oh My!
In fact, by strengthening the quadriceps and other muscles that wrap around your knees, you are building their support system and giving them more thorough protection than they would otherwise have. But, what about depth? Doesn’t going too far past parallel put more stress on your knees?
To answer this question, in 2013 researchers reviewed the results of over 164 articles that all looked into the forces active on the knees during a squat (3). What the team found was surprising: While the stress on the knee gradually increases as the angle gets closer to 90 degrees, it only decreases from that point on.
At the end, the researchers made this comment:
“… deep squat presents an effective training exercise for protection against injuries and strengthening of the lower extremity.”
Another common safety tip you may hear when it comes to squats is that you should never let your knees go beyond your toes. This is actually a kind of tricky one to untangle.
For most people, this is an easy tip to remember and apply. And for many, it’s true. But many individualized and largely genetic factors can influence where the knee ends up even during an otherwise flawless squat (4).
For example, the length of the bones involved or the mobility of the ankle and hip can all control where the knee is supposed to be in relation to the toes. A person with long bones in their shins or thighs, for example may not be able to keep their knees back without sacrificing form in another way.
Even more important, though, there is no evidence to suggest that allowing the knees to go past the toes is always going to cause problems. If your knees naturally extend out that far, however, trying to change that could put excess stress on the joint.
Rather than trying to apply a rigid rule to everyone, a much better approach would be to listen to your body. When you perform a bodyweight squat, do your knees pass your toes without pain? Then let them be. Just make sure you’re doing your best to sit back on your heels as if you were sitting down into a chair.
Squat Variations
There are numerous squat variations to choose from. Exactly how you use each of these exercises will largely depend on your goals, since they each emphasize different parts of the larger movement.
Let’s take a look at some of the more common squat variations, including what they’re good for and how to do them safely.
Back Squat
The most common and straightforward of the squats, this exercise effectively works most of your body. It is also an excellent way to improve overall mobility.
It does have some downsides, though; You’ll need a squat rack, a barbell, and some weight plates. Carrying the loaded bar on your back can also create compressive forces on the spine that people dealing with injuries may need to avoid.

How to do it:
- Stand in the rack, with a loaded bar resting across the back of your shoulders, at the base of your neck. Grip the bar with your palms facing outward.
- Straighten up so that that bar is solely on you and no longer supported by the rack. Step away from the rack to free up your full range of motion.
- Keeping your core tight, your back straight and your eyes forward, drop your hips back and down toward the ground.
- At the same time, allow your knees to bend forward, keeping them pointed in the same direction as your toes.
- Lower yourself until your thighs are past parallel with the ground, but go deeper if you can.
- Pause for a moment before pressing on your heels and straightening your legs to return to standing.
Front Squat
This is particularly useful and interesting variation simply because of the huge difference a small adjustment makes.
Instead of resting the bar across the back of your shoulders, this exercise requires you to hold it in front of you, on the front of your shoulders.
What are the benefits of front squats over back squats? Shifting the weight forward places a much greater strain on your core, requiring it to work much harder to keep you upright and balanced.
This change also requires your knees to flex more, allowing you to go deeper and placing a greater emphasis on your quads.
By taking the bar off your back, fronts squats greatly reduce the compressive forces on your spine.
How to do it:
- Begin with the bar racked at chest height. Rest the bar against the front of your shoulders and cross your arms. Your arms should remain parallel to the ground while your hands rest on top of the bar.
How to do it:
- Keeping your core tight, your back straight and your eyes forward, drop your hips back and down toward the ground.
- At the same time, allow your knees to bend forward, keeping them pointed in the same direction as your toes.
- Lower yourself until your thighs are past parallel with the ground, but go deeper if you can.
- Pause for a moment before pressing on your heels and straightening your legs to return to standing.
Overhead Squat
This variation both requires and develops mobility in your back, shoulders and hips.
It can be done with a barbell, dumbbells, kettlebell, or even just a weight plate.
Because of the strong reliance on flexibility, do not expect to be able to lift as much with the overhead squat as you can with other variations. In fact, you could start out just using a broomstick.
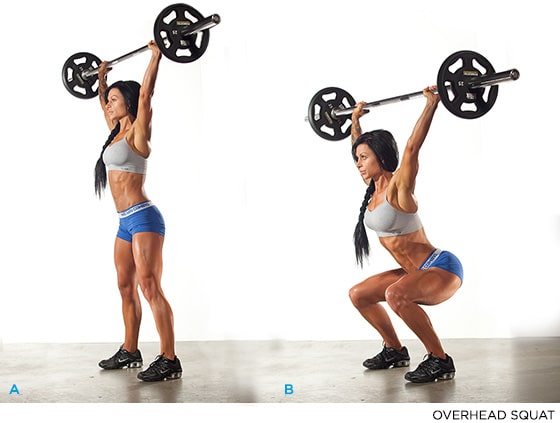
Image courtesy Bodybuilding.com
How to do it:
- Stand with your feet wider than shoulder-width apart and your toes pointed outward. Hold the bar with a wide, overhand grip.
- Snatch the bar (or other form of resistance) over your head and keep your arms extended.
- Keeping your core tight, descend until your knees and hips are fully extended.
- Straighten your legs to return to the starting position.
Note: Do not attempt this squat unless you are very well trained and have excellent shoulder/upper back mobility.
Goblet Squats
Typically done with a dumbbell or kettlebell, this exercise can also be performed with a simple weight plate if that’s what you have. Based on the same concept as the front squat, this variation moves the weight to your front, putting more emphasis on your back and core.
A key difference between goblet squats and front squats, though, is that the goblet squat allows for a much greater involvement of your lats and arms.
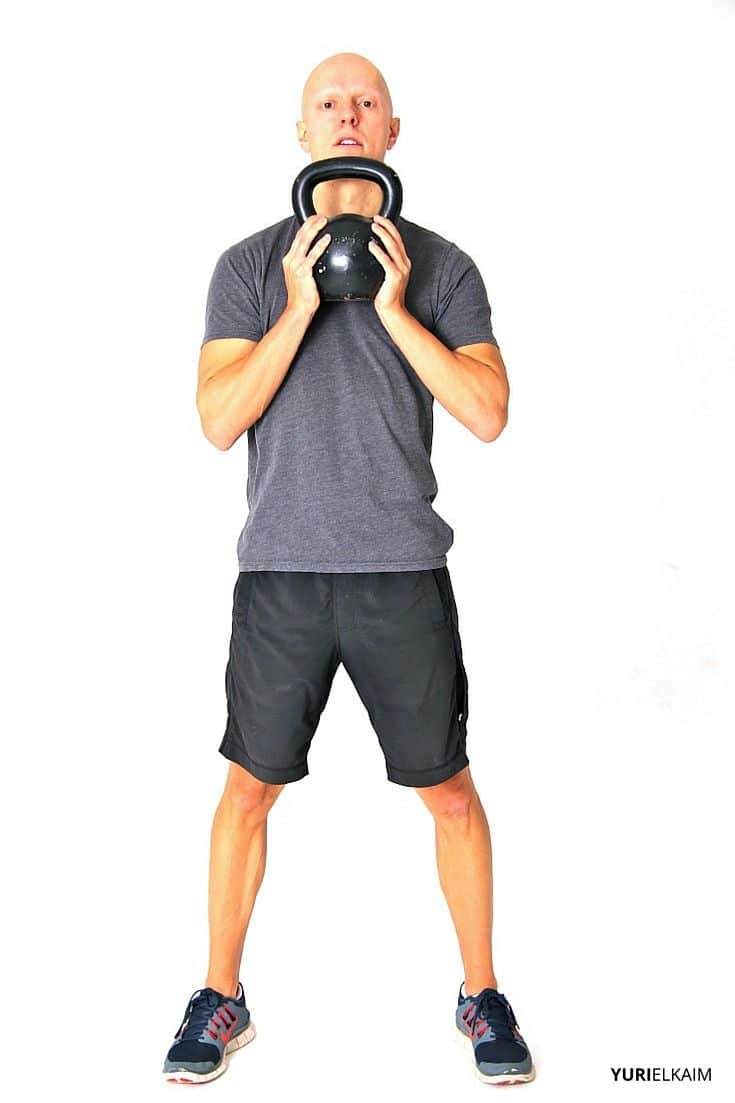
How to do it:
- Grip one weight with both hands and hold it close to your chest with bent arms, like you’re holding a giant cup (hence the “goblet). Do not allow the weight to rest against you.
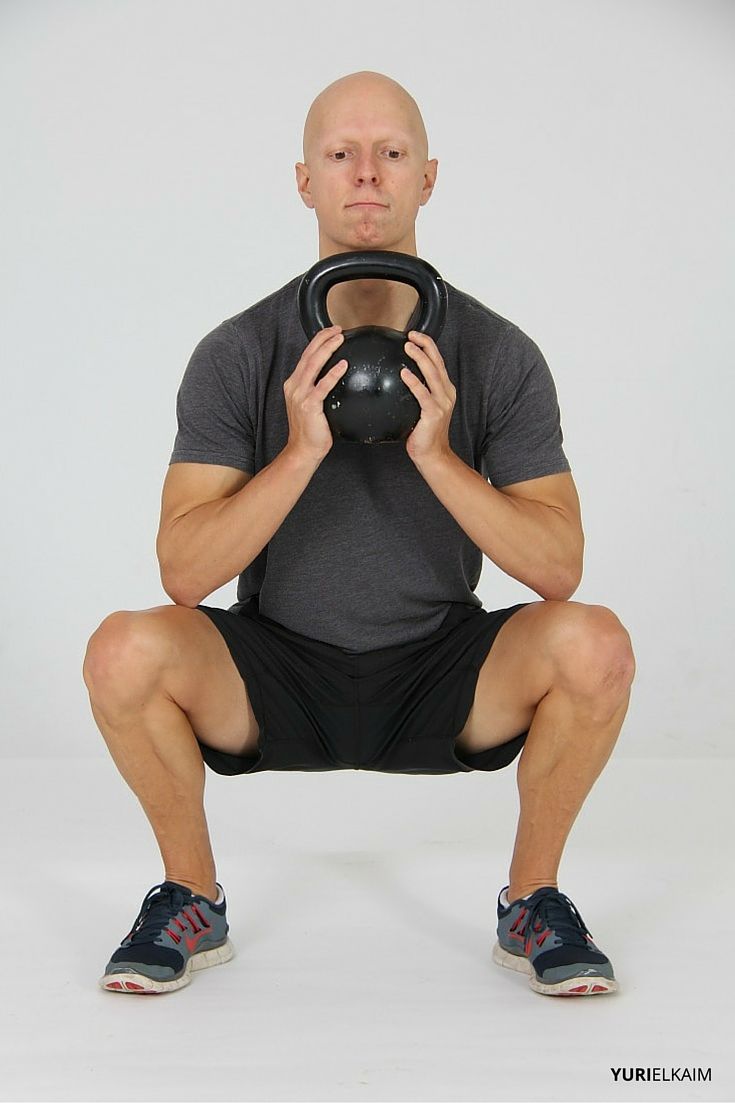
How to do it:
- Keeping your core tight, descend until your knees and hips are fully extended.
- Straighten your legs to return to the starting position.
Sumo Squat
This squat variation also has several variations of its own, depending on the type of equipment you have at your disposal. The constant, however, is the wide stance, reminiscent of a Sumo wrestler.
This wider stance places a greater challenge on your glutes and inner thighs to lift your body upright again. Your core will also have to work hard to keep you balanced.
It should also be noted that the Sumo squat is performed by the lifting the weight – which can be a dumbbell, barbell, kettlebell or plate – off the floor. This is a useful variation if you have limited equipment.
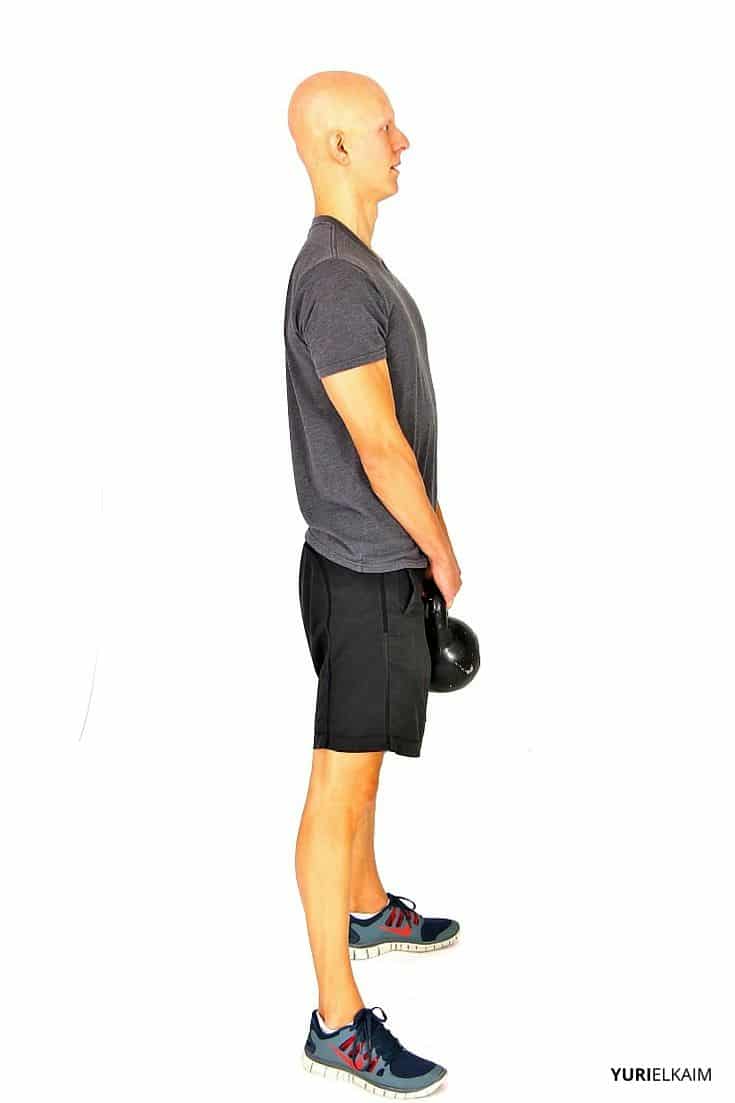
How to do it:
- Place your feet in a very wide stance, much wider than shoulder-width, and grip the weight with both hands.
- Keeping your back straight and your core tight, press your heels into the ground to stand up straight. You may find that your range of motion is limited by the stance.
How to do it:
- Drop your hips down and back, allowing your knees to follow, until the weight is back on the ground.
Bulgarian Split Squat
Although it has a very different look than most squat variations, the Bulgarian split squat has several powerful advantages. For one, your upper body is essentially taken out of the equation – so that your movement is no longer limited by the strength of your core and upper back.
Of course, this could be a downside if you want to work those muscles. If you’re just looking to isolate the legs, however, the Bulgarian split squat is ideal.
This variation is also useful because of it’s adaptability. It can easily be performed with any form of resistance, or none at all. To get you started, I’ll describe the form using just your bodyweight.
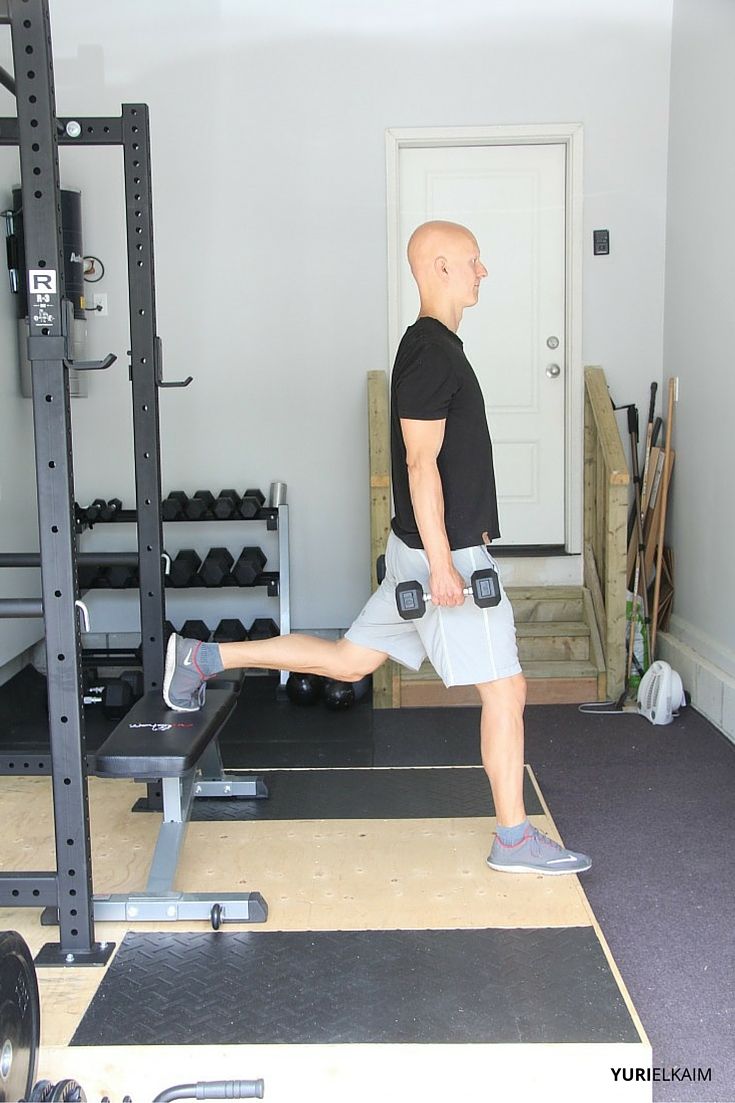
How to do it:
- Stand with your back to a bench and bend your left knee to rest the top of your left foot on the bench.
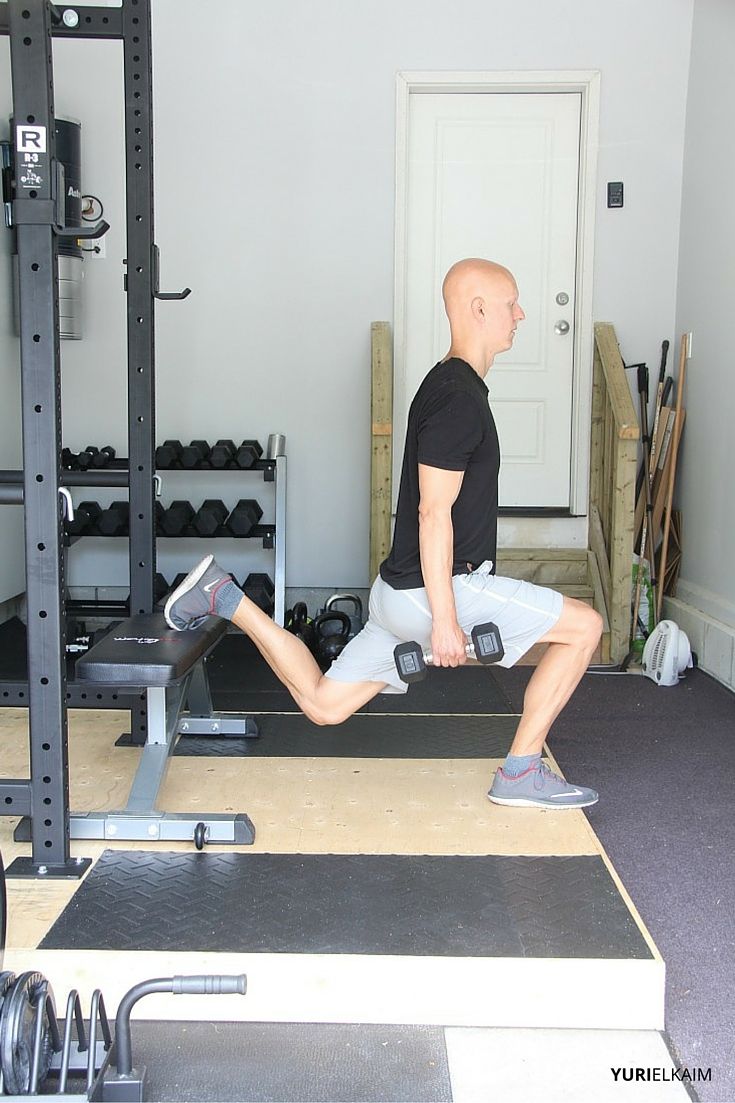
How to do it:
- Keeping your back straight, bend your right knee to lower yourself toward the ground. Stop when your knee is just past parallel to the ground. Do not allow your left knee to touch the ground.
- Straighten your right leg to return to the starting position.
Jump Squats
As a bit of a side-note, bodyweight squats, back squats and Bulgarian split squats can all be given a different spin by adding a jump at the top. This requires you to move through the exercise quickly and dynamically, making it a perfect tool for athletes looking to build power and improve their jump.
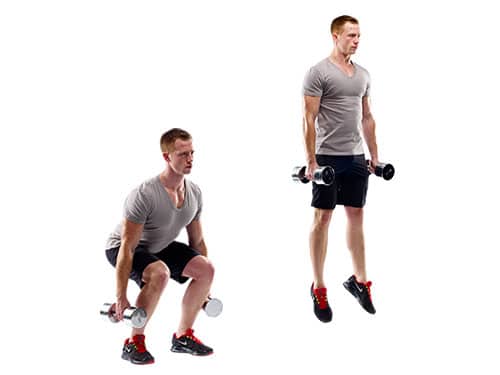
Image courtesy BasketballHQ.com
Because of the high-impact nature of this approach, though, it’s not recommended for people with knee injuries. Even for the otherwise healthy individuals out there, caution is needed when jumping around while holding weight.
Working Your Way Up
With all of that knowledge how can you string it together and progress toward a powerful, effective squat? Here’s a progression, using a few of the variations discussed above, to will help you build both the strength and mobility needed to safely pull off a weighted back squat.
For each exercise, work until you can perform 3 sets of 12 reps with perfect form, going as deep as you can. While working on the bodyweight squat especially, your goal should be to lower your butt as close to the ground as possible.
It may take several weeks for you to master each movement before you can comfortably move on to the next. That’s fine. The goal is to have a strong foundation before you end up at the back squat and each step in this progression will develop a different skill that you’ll need later on.
The weights recommended for the loaded exercises are intended to get you up to working with a standard Olympic bar, which weighs 45 pounds unloaded.
- Bodyweight squat
- Goblet squat (Progress when you can perform 3×12 with 20 pounds)
- Front squat (Progress when you can perform 3×12 with 45 pounds)
- Back squats (Start with 45 pounds)
Do You Even Squat? Yes!
As we’ve seen, the squat is a hugely important exercise. Not only is it a basic human movement that will help to increase your flexibility, mobility and strength but it can also burn through tons of fat all at once.
The key is to start slow, generally with bodyweight squats, and be sure that your form is perfect. From there you can gradually progress to some of the more challenging variations. Along the way, you can also use different squat exercises to tailor the workout to your specific needs, limitations and circumstances.
Move Your Muscles, Blast Fat
Nothing blasts fat like a resistance training circuit – and nothing’s quite more convenient than a bodyweight circuit. Put the two together and you have a winning combo workout you can do anywhere!
Download my 6-exercise bodyweight circuit workout to burn more fat and get stronger. It includes an instructional video, workout tracker, and follow-along audio. The Bodyweight Circuit Workout is a $29 value – yours FREE by clicking the banner below.